How To Make Neapolitan Pizza At Home – Step By Step Guide
Update: This guide still works, but it’s outdated. For a better guide to making Neapolitan pizza, check out my new recipe here.
If you think you can’t make a good, Italian-style pizza at home, think again, and keep reading. I’m going to show you exactly how to make Neapolitan pizza at home, step-by-step, using a tested and simple recipe.
Neapolitan pizza is my favorite kind of pizza. I love the simplicity and freshness of the ingredients. I also love the history and tradition of this classic pizza.
This is also my favorite kind of pizza to make at home, which may come as a surprise to some. Isn’t it hard to make a Neapolitan?
Watch this short google web story to get a feel for the recipe, or scroll down for the full set of instructions.
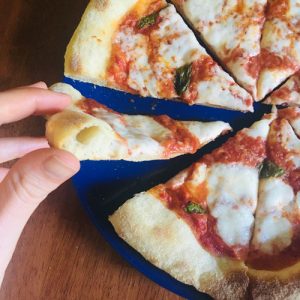
Neapolitan Pizza
Ingredients
- 250 g Dough
- Approx 45 g San Marzano Tomato Sauce
- Several dash extra virgin olive oil
- 85 g Fresh Mozzarella
- 2 Leaves Fresh Basil
- 2 pinch Dried Oregano
Instructions
- Begin with a properly shaped dough ball that has had 1-2 hours sitting at room temperature.
- Shape your dough by gently pressing the air from the middle of the dough into the outer crust. Use plenty of semolina flour to prevent sticking.
- Carefully slide your dough onto the pizza peel and quickly cover in sauce. Slide onto pizza stone and let cook until bottom of crust starts to show small brown spots.
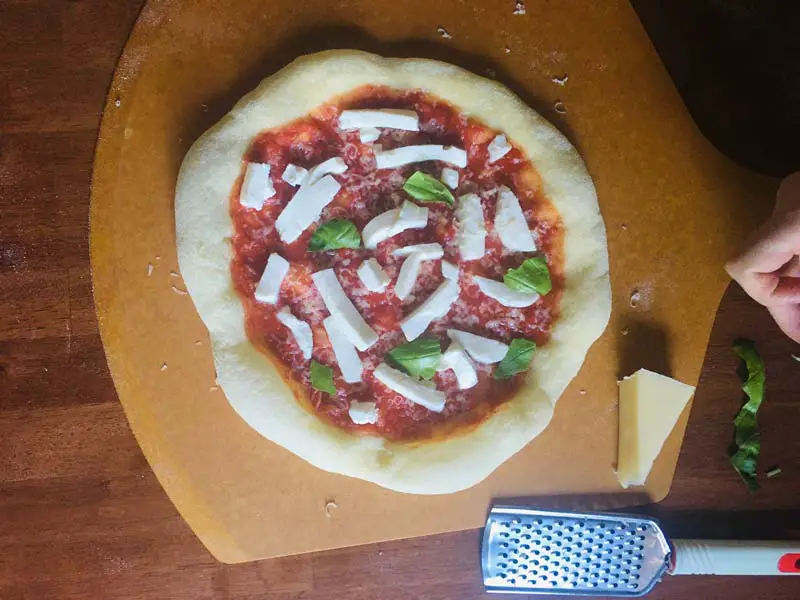
- Remove pizza from oven and add Parmesan cheese, fresh mozzarella and fresh basil. Add freshly grated Parmesan first then space out the fresh mozzarella cheese in chunks so that there are equal parts cheese covered and uncovered sauce areas. Tear up fresh basil leaf and place sparingly between cheese chunks. Lightly drizzle some extra virgin olive oil sparingly across the top.
- Watch carefully and remove once cheese is slightly bubbling but before it browns. The cheese should be melted, not cooked. Hopefully at this point the outer crust is slightly browned but still soft, otherwise you might need to adjust your timing next time. Remove from the oven and immediately place the pizza on a cooling rack for 2-3 minutes. Cut and serve. Enjoy!
Most people familiar with this kind of pizza know that one of its primary characteristics is a charred crust with a soft chewy center. And it’s true – this is something that can be very difficult to achieve in a conventional home oven.
But thankfully, I’ve done all the experimenting, so you don’t have to! And I’ve figured out exactly how to make perfect pizza crust in a home oven.
So how exactly do you make something intended to be baked at 900°F in an oven that barely reaches 500°F? Stick with me – it’s easier than you think.
Before we get started actually making your pizza, you’re going to need pizza dough, pizza sauce, high quality mozzarella cheese, basil, olive oil, and flour, as well as a pizza peel and stone (don’t worry – they’re not expensive).
Don’t feel overwhelmed – it’s not as difficult as it sounds, and it’s a really fun process (maybe try it with your kids!).
You’re not just learning a recipe – you’re learning a new skill. A very tasty and useful skill at that!
So let’s jump in!
Neapolitan Pizza Step 1:
Make a Super Hydrated Dough
To make your Neapolitan style pizza, first you’ll need pizza dough – but not just any kind of pizza dough. You’ll need a super-hydrated dough that will withstand the drying effect of the all that extra time in the oven due to the lower temperature.
Standard Neapolitan style dough used in pizzerias has a hydration of around 50-60%. This is perfect for a pizza oven that hot enough to flash cook a pizza in 90 seconds. That’s literally how quickly they cook pizzas in good, Italian pizzerias.
Baking pizzaeria-style dough for any longer than a minute or two will dry out the crust. But of course – your home oven won’t be able to cook your dough and melt your cheese that quickly.
So the simple solution is just to adjust your dough recipe.
For my pizza doughs, I like to aim for 70-80% hydration. This makes for a very wet dough that will make a light and fluffy crust, even after baking in the oven for up to 10 minutes.
If you can’t find a pizza dough like this at your local grocery store or pizzeria (hint: you probably won’t), you can follow my exact recipe here.
It’s a little stickier to work with than most dough, but I promise it’s easy to make even for a beginner.
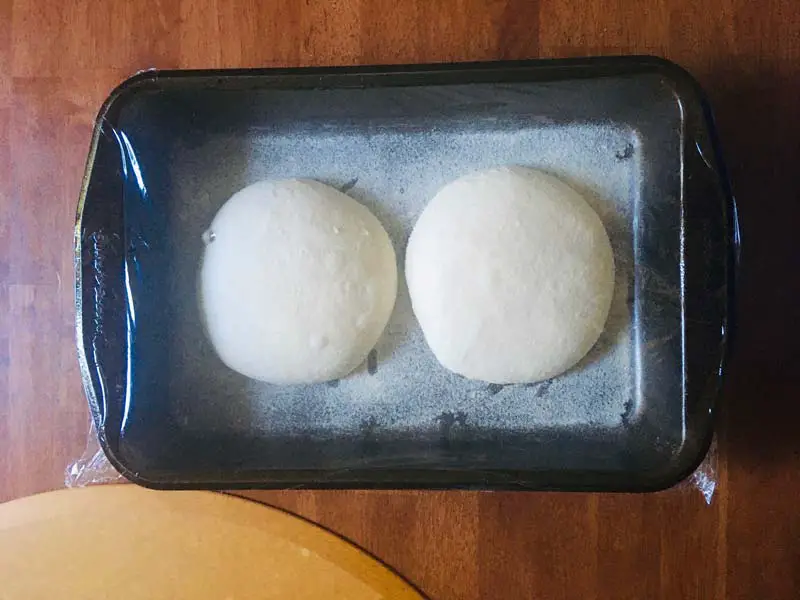
Make sure you read my article on making dough to learn how to roll your dough up – you’re going to want to take your dough ball out of the fridge and let it sit at room temparate at least 1-3 hours before you start (depending on the temperature of your house). It should sit on a lightly floured and tightly covered surface – I usually use a baking dish.
When you’re ready to make start making your pizza, you’re going to heat up your pizza stone in your oven for at least an hour at 500ºF (or as high as your oven goes).
Get your cheese and sauce ready, and let’s make a pizza!
Step 2: Stretch & Shape Your Pizza Dough:
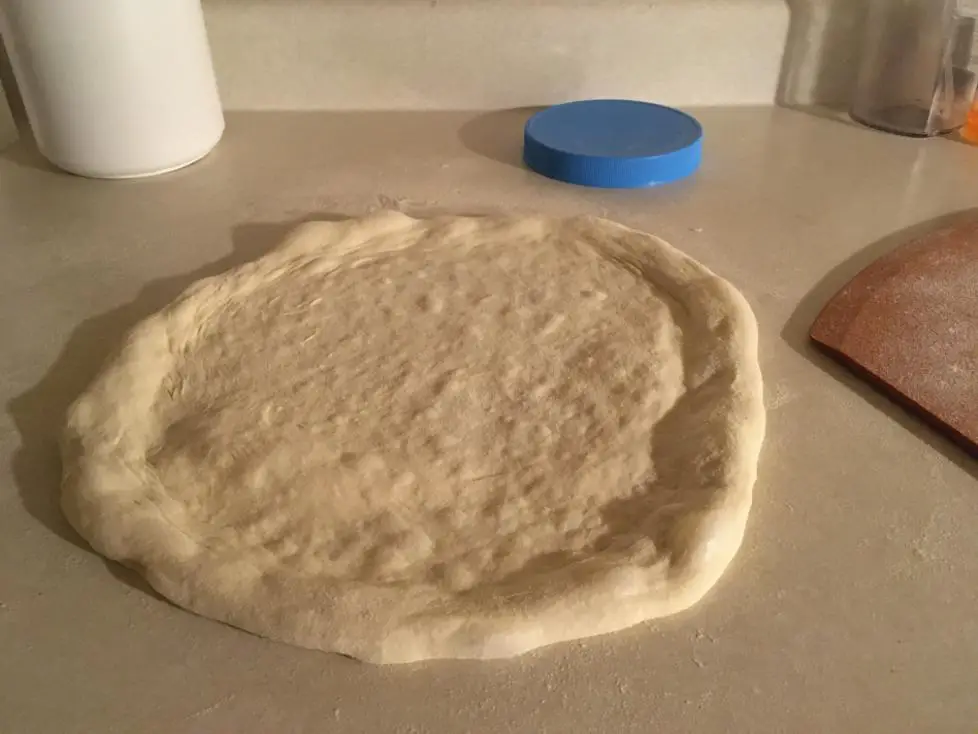
Pay attention because this is the trickiest part of the whole process. The aim here is to stretch and shape the crust evenly without tearing or folding the dough onto itself.
If you followed my no-knead dough recipe, you should have a highly hydrated dough shaped into a ball. The dough should be sitting at room temperature for at least 2-3 hours on a lightly floured and tightly covered pan before you get started.
After sitting out so long, your dough ball has probably flattened quite a bit from when you first shaped it, and that’s fine.
Use a dough scraper to scoop up the dough ball. If you have two dough scrapers, it’s even easier. The aim here is to remove the dough from the surface while disturbing or pinching it as little possible.
Place the dough onto a large pile of flour on your counter. Gently pat the top of the dough to make sure the underside has enough flour, then carefully turn it over and repeat.
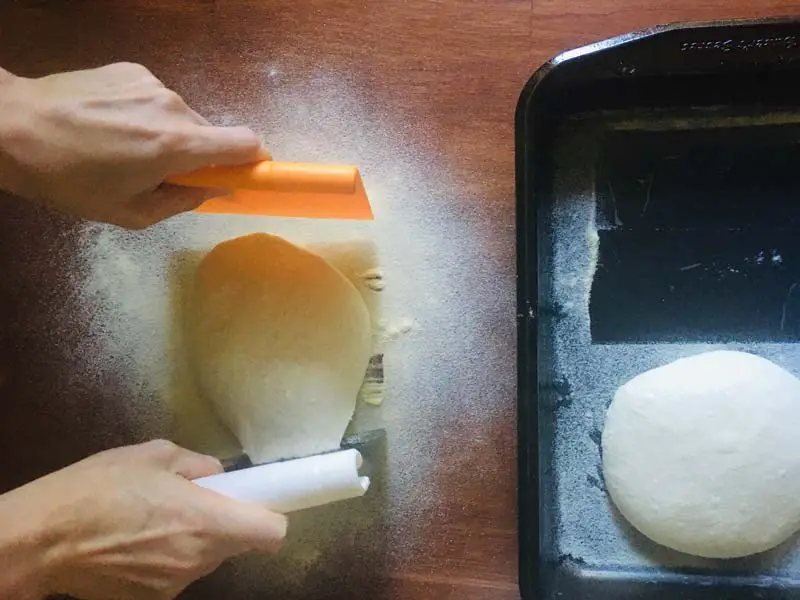
Try your best not to pinch the edges – these will eventually form our puffy Neapolitan crust.
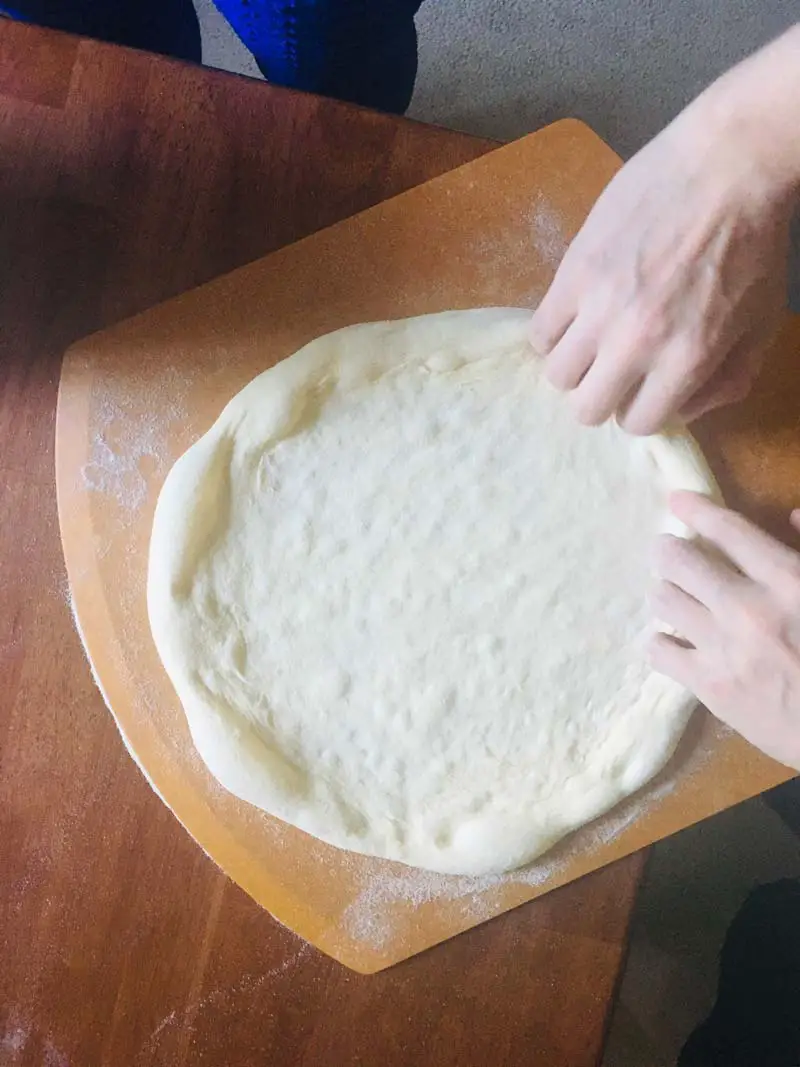
While the floured dough is still resting on the pile of flour, gently being to shape the outer crust. With your fingers, lightly indent the outline of your crust about an inch wide around the entire pizza.
Next, very lightly press the center of the dough and work your way to the edge of the crust you made previously. The aim here is not necessarily to flatten the dough but to stretch it by moving the air from the middle to the outer crust.
Once you’ve done this once around the dough, carefully flip it over onto the pile of flour and do it again on the other side.
Next, carefully lift the dough from the pile of flour and place it onto a clean part of your counter. Placing one hand in the middle of the dough, use your other hand to gently stretch and pull while not tearing the middle or flattening the outer crust. Carefully turn the dough and repeat as you work your way around the pizza crust.
Your aim here is to have a consistent level of thickness all around your pizza so you get the classic Neapolitan look and feel.
Yes, it’s all a bit easier said than done. Your first try will likely not be perfect, but keep trying and have fun! Like I said, you’re learning a new skill here – it’s a pretty cool hobby! And something fun to try with your kids
If you tear or fold the dough onto itself, just patch it up and flatten it out and try to make the best of it. It will still taste good, but when you get it right you’ll be able to tell the difference on the first bite.
The good thing about making Neapolitan pizza is that even if you mess up, your ‘mess’ will still be pretty tasty!
Step 3: Sauce the Dough
For this step, you’ll need a classic Neapolitan tomato sauce. You can follow my complete pizza sauce recipe here, but it’s basically a can of good quality peeled tomatoes, hand crushed with a bit of sea salt and basil added.
(Maybe you’re picking up on a theme here – Neapolitan pizza is all about simple ingredients, which is one of the reasons it’s so healthy!)
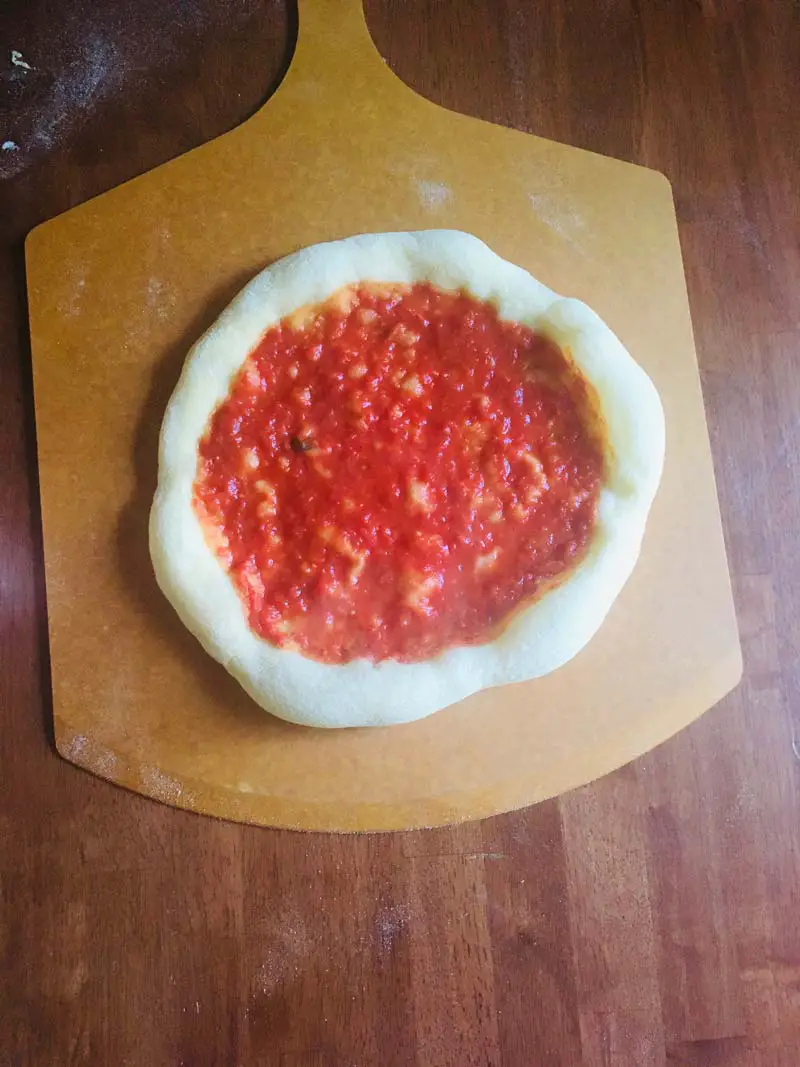
Take one or two large spoonfuls of sauce (60-80g or about half a cup) and drop it on the middle of the dough.
Carefully spread the sauce in a circular motion, moving it from the center up to the inner edge of the crust. Make sure not to cover the outer edge of crust or it won’t rise and puff up like it’s supposed to.
Protip: don’t use too much sauce! You should still be able to see the whiteness of the dough through the sauce.
Step 4: Pre-Bake Your Neapolitan-Style Pizza
You might be thinking you missed the part where you put the cheese on, but you didn’t. This is my secret to making the perfect Neapolitan style pizza at home. You’re going to bake your pizza in two separate phases.
I do it this way so the cheese and toppings don’t overcook. Remember, traditional Neapolitan pizza is cooked in an oven so hot it only needs a minute or two.
So cooking your dough a bit first is the best way to replicate the results using a home oven.
Carefully slide your sauced pizza dough onto a lightly floured baking peel (don’t have one? Find all my essential pizza making tools here).
If your dough is sticking to the counter, you might have left it sitting too long, or you didn’t properly flour the dough during step 2. If so, take a piece of dental floss and run it under the dough with a bit of extra flour to un-stick it.
Once the dough is on the peel, it will probably be a bit misshapen. If so, carefully pull the sides to form it back into a circle. Next, slide it onto a hot pizza stone on the bottom rack in an oven set to 500°F (or 260°C), preheated for at least 1 hour.
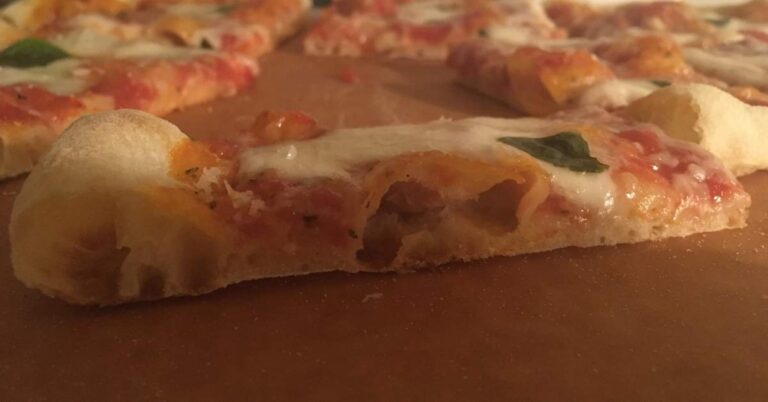
If you’ve made and prepped your dough properly, the outer crust of your pizza should puff out and rise considerably within the first minute.
I don’t like to give specific times for my recipes because everyone’s oven is slightly different, so after a few minutes check your crust. Once the bottom is firm and the outer crust is ever so lightly golden, it’s ready to come out.
At this point the sauce should be sizzling but still appear wet.
Slide the pizza back onto the peel and take it out of the oven – we’re ready for the next step!
Step 5: Apply Your Toppings
This final step needs to be done relatively quickly so the dough and sauce don’t cool down too much and interrupt the backing process.
So you should have your toppings ready before you take your pizza out of the oven.
Spread approximately 100g of ‘fior di latte’ mozarella cheese* in chunks around the pizza. You don’t want to completely cover the surface like on an American style pizza.
Instead there should be equal parts cheese and uncovered areas of tomato sauce.
*Try to use the best mozzarella cheese you can find/afford, but stick with something made from whole milk and with a high level of moisture if you can. If you’re trying to save money, consider making your own mozzarella (instructions here).
Next, tear up 1-2 leaves of fresh basil into several big pieces and spread them sparingly on the pizza.
Finally, drizzle on a bit of extra-virgin olive oil and carefully place the pizza back onto the baking stone.
Step 6: Finish the Pizza
Watch your pizza closely as it cooks in this final stage, because it shouldn’t take long.
When you see the cheese is melted into white puddles, turn your broiler on high. Once the majority of your cheese is bubbling rapidly, the pizza is done and you can take it out of the oven.
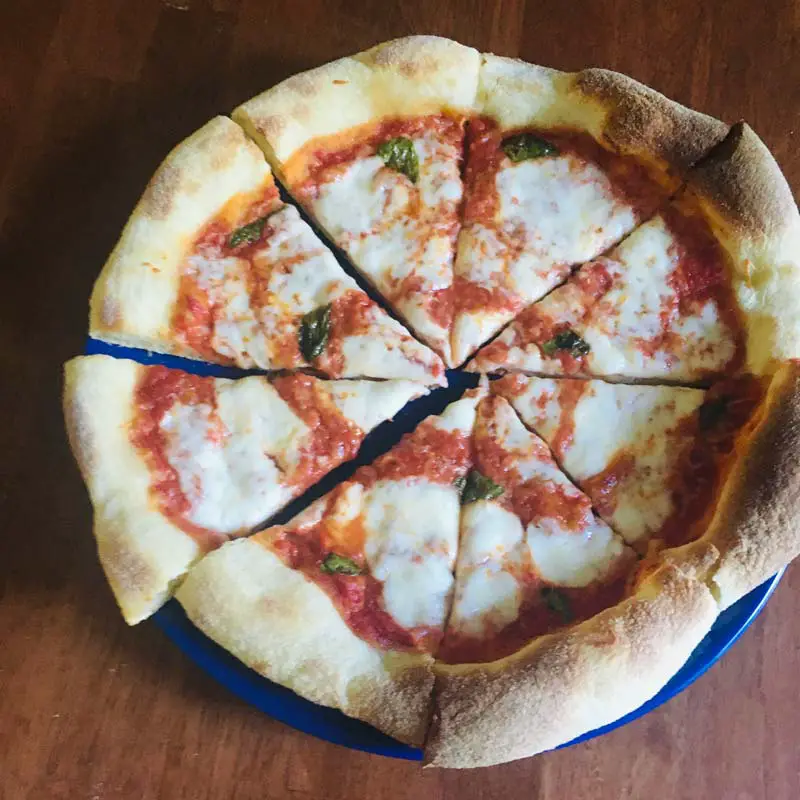
Hopefully you should have a delicious looking pizza that looks something like this one. If you notice large brown spots on your cheese you’ve likely overcooked your toppings. Next time either take the pizza out sooner or leave the pizza in longer before applying toppings in phase 2.
On the other hand if your cheese is still solid and chewy, you probably took it out too soon.
Don’t feel bad either way! It took me several attempts before I got anything close to what I’d consider “perfect”.
And like I said, ‘imperfect’ pizza is pretty darn tasty too!
Step 6: Enjoy Your Pizza
Time to indulge! And thankfully, because Neapolitan pizza is much healthier than its North Amerian counterparts, this is something you can enjoy pretty often as part of a healthy diet.
Maybe add a side salad if you’d like to round things out (hint: it’s really yummy to dip the crust in left-over basalmic salad dressing!. Sometimes, if we’re having a pizza-and-movie-night, we’ll also add some popcorn as a side.


