Best Ooni Pizza Dough Recipe: Extra Hydration, Double Fermented, Better Gluten Development
Ooni’s professional line of pizza ovens are amazing. They’re inexpensive, portable and reach temperatures of 950F – just like the best pizza ovens in Naples. But all that hardware isn’t going to get you any closer to the perfect homemade pizza without the right pizza dough recipe.
This pizza dough recipe is a variation of my standard homemade pizza dough recipe and it’s perfect for high temperature pizza ovens like those made by Ooni. It has a 65% hydration level, which produces a crispier crust that’s still tender in the middle compared to traditional pizza dough.
The best part about this pizza dough recipe is that it follows my no-knead methodology, meaning no getting your hands dirty or wondering if you kneaded it enough. By the way, this recipe works just as well using a Roccbox (or any other pizza oven) as it does with an Ooni.

Ooni Pizza Dough Recipe – 65% Hydration, No-Kneading
Ingredients
- 300 g Tipo 00 or Bread flour (2.4 cups) Note: All purpose works as well, as long as it's high in gluten and protein. If the flour is weak, the dough will be as well.
- 200 ml Lukewarm Water (0.8 cups)
- 1/4 tsp Active or Instant Dry Yeast Note: If you plan on using the dough sooner than 24 hours, triple the yeast. More yeast = faster rise but less flavor.
- 9 g Fine Sea Salt (1.5 tsp)
- 7 g Extra Virgin Olive Oil (1.5 tsp) Optional: Improves stretch and softness of dough, but not strictly necessary.
- 9 g Honey (0.5 tbsp) Optional: Not necessary when using an Ooni pizza oven unless you want an extra dark and crispy crust. Great for American styles, not needed for Neapolitan.
Instructions
Ingredients Prep
- First, measure out the water and yeast in a large mixing bowl. Stir lightly until the yeast is fully hydrated and the water is a slightly brown color.
- Set the mixing bowl with water and yeast to the side. In another bowl, measure out the flour and salt. Gently mix the salt into the flour using your finger.
- Have your olive oil ready somewhere nearby. We’re not going to add this into the recipe until about halfway through the process.
Mixing The Ingredients
- Using a hard spatula or wooden spoon, start to slowly stir the flour and salt mixture into the bowl of water and yeast. I find it’s best to mix in a few spoonfuls of flour at a time rather than dumping it all in at once. Do this until you’ve mixed in roughly 75% of the flour.
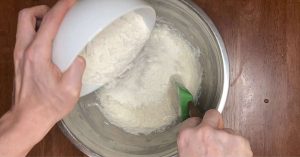
- Optional: When roughly 75% of the flour is mixed into the water, add the tablespoon of extra virgin olive oil and fully incorporate it into the dough mixture.
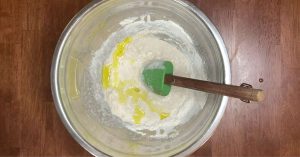
- Mix the remaining 25% if flour into the rest of the ingredients. You can stop mixing when you can’t see anymore dry flour in the bowl. It should be a rough, shaggy ball of dough.
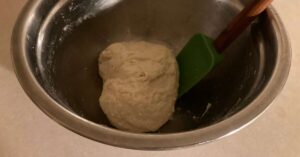
Preparing The Dough (No-Knead Method)
- Cover the bowl tightly with an air-tight lid or plastic wrap and let it sit at room temperature for approximately 15 minutes.
- After 15 minutes, come back and give the dough another mix with the spatula. You should find that the dough is much smoother and less sticky because of gluten development. Turn and fold the dough onto itself for another 1-2 minutes and cover it back up tightly.
- Let the dough rest at room temperature for 2-3 hours, then place it in the fridge to cold-ferment overnight. 24 hours is ideal, but 48-72 is better. Longer fermentation = better taste and texture.
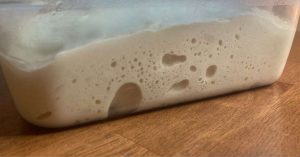
- The dough won't rise much in the fridge, or in the 2-3 hours before due to the minimal amount of yeast used in the recipe. This is normal, but you should notice some changes in texture and bubbles forming. When the dough is balled and proofed later, each dough ball will approximately double in size.
- Take the dough from the fridge and divide it in half into two 250 gram dough balls. While the dough is cold, handling will be easy but you can (very) lightly coat your hands in olive oil to avoid sticking.
Proof The Dough Balls
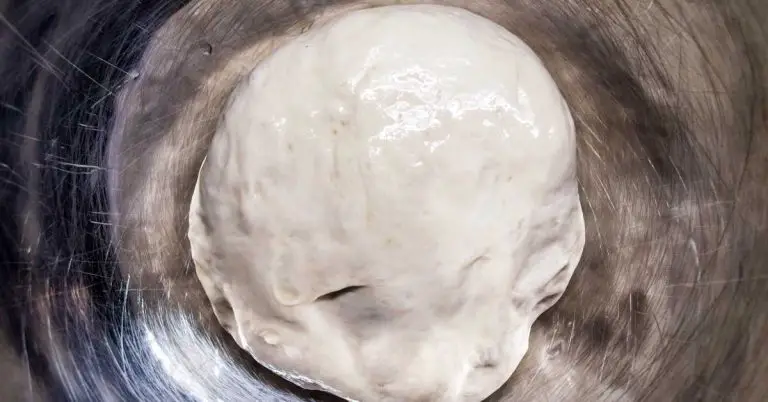
- Form each piece of dough into tight balls. If you need help with this step, follow my tutorial on dough balling below. Place each dough ball into a lightly oiled resealable container. Let the dough "proof" in its container at room temperature for 4-6 hours. The dough ball will expand (about x2) and become light and airy.Note: The warmer the room, the faster the dough will proof. If its too warm or left too long, the dough will "overproof", which degrades its structure and taste.https://www.myhouseofpizza.com/how-to-shape-pizza-dough-ball-proofing-guide/
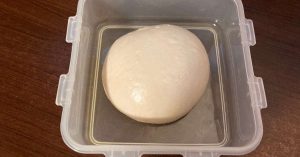
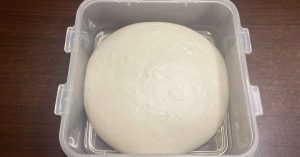
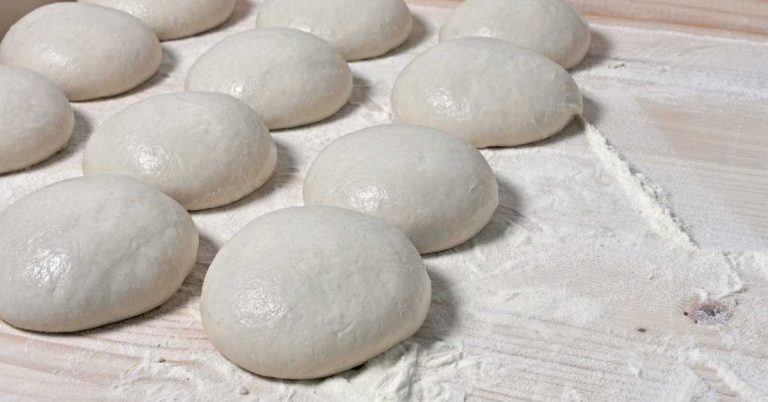
- When the dough is fully proofed, it will look something like this.
Making The Pizza
- When the dough is fully proofed, get a large container full of semolina flour, or just make a pile on a clean counter. Flip the oiled container with the dough upside down and it should slide out into the flour. Flip the dough over to coat all sides with flour, but be careful not to squeeze the dough or ruin its shape. This is called a "flour bath".
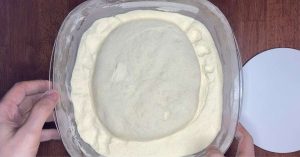
- At this point, you can prepare the dough however you're accustomed to, but I recommend stretching by hand by carefully pressing from the middle of the dough ball outwards to move the air into the outer edges. Don't pinch the edges if you want a puffy crust.Don't be afraid to use as much semolina as necessary to avoid sticking, but only use it to coat the dough, don't knead it it or you risk changing the hydration ratio.If you need a visual guide for stretching pizza dough by hand, check out my tutorial below:https://www.myhouseofpizza.com/how-to-hand-stretch-pizza-dough/
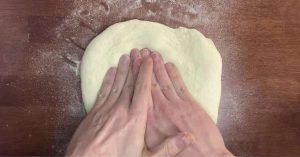
- When the dough is stretched to your liking, carefully transfer to a floured pizza peel (you can slide it on, or carefully lift it from underneath), then top it with your preferred toppings and give the peel a shake to make sure it isn't sticking. Give the dough a final stretch by carefully pulling the edges in each direction (don't pinch) and quickly launch it into your Ooni pizza oven. If you used enough flour on the peel, and haven't overloaded with wet toppings, it should slide off easily without losing its shape. It it doesn't, use more semolina next time.

Notes
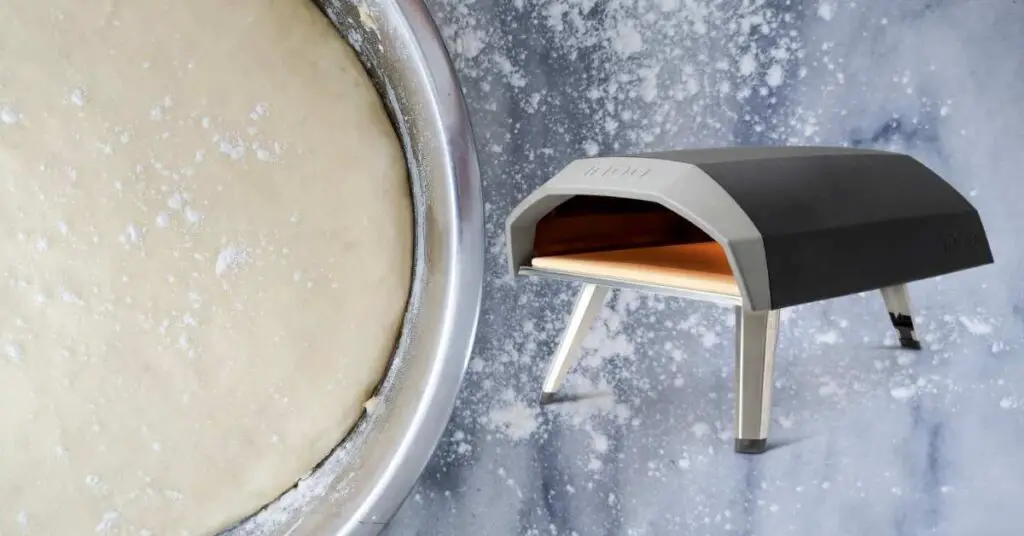
Why This Is The Best Ooni Pizza Dough Recipe
Ooni has an official pizza recipe they offer on their website that you may have already seen. It’s a perfectly fine pizza dough recipe, but in my opinion it’s a little basic.
The official Ooni recipe has a hydration level of 60%, which is well within the range of a standard Neapolitan style pizza dough. My pizza dough recipe has a 65% hydration level which gives it a bit of extra moisture while not being so hydrated that it becomes too sticky to work with.
That extra hydration makes the pizza dough softer on the inside and give it a bit of extra “oven spring” as soon as it hits that super hot surface of the Ooni oven. When moisture is heated under extreme temperatures, it expands. In the context of a pizza dough, this means your crust will rise and puff up more as it bakes than it would using a standard pizza dough recipe with lower hydration.
A 65% hydration pizza dough recipe is going to give your pizza a fluffier, airier and more delicate texture when it comes out of the oven.
Double Fermented, No-Knead Method
The best part about this pizza dough recipe, compared to the official Ooni recipe, is that it’s double-fermented and follows my no-knead methodology.
While you only need to leave this pizza dough overnight (or for 24 hours), you can easily leave it for 48-72 hours for double fermentation. Fermentation is basically what happens when you leave you pizza dough to sit for an extended period of time, during which the yeast continues to affect the taste and texture of the dough. The longer the fermentation, the better the crust will taste and rise while cooking.
But perhaps the biggest advantage to long fermentation times is that is eliminates the need to knead the dough.
Kneading is normally what you do to develop gluten within the dough, which is what gives it its ability to stretch without tearing. Without a strong gluten network, pizza dough will bake into a flat, dense disk with no texture – basically a bready tortilla shell.
But gluten isn’t just developed manually when you knead, it also forms naturally over time. So, if you’re willing to wait 12-24 hours, your pizza dough will automatically develop gluten as strong or stronger than if you were to knead by hand.
This means no messy hands or sore arms from kneading for 30 minutes straight. Just roughly mix the ingredients together, and let time do the heavy lifting for you.
Note: If you have a stand mixer, this is obviously the fastest and easiest way to develop gluten. But you still won’t get the added benefits of fermentation. There’s also little point of using a dough mixer then fermenting, since gluten will form by itself during this time.
Best Flour For Making Ooni Pizza Dough
In this recipe, I call for Tipo 00 flour. Tipo 00 is a special variety of finely milled Italian flour with lots of gluten and protein that’s perfect for making pizza.
The finely milled grains give the crust a soft and delicate texture, while the extra gluten and protein make the dough strong and easy to stretch. This is typically how gourmet pizzerias produce a crust that’s both crispy and charred on the outside and tender in the middle.
While there are plenty of amazing Tipo 00 flours available, such as the many 00 varieties offered by Caputo, not everyone has access to them. In these cases, you can use all-purpose flour or bread flour.
I recommend using bread flour as an alternative to Tipo 00, or even a 50/50 blend of bread flour and all-purpose. You can use all-purpose alone if you must, but be aware that many cheap brands of all-purpose don’t contain enough gluten or protein and produce weak pizza dough that doesn’t stretch or rise properly. Some all-purpose brands work great, though, so feel free to experiment.
But if possible, invest in some high-quality Tipo 00 flour. My favorite variety is Caputo 00 Chef’s Flour, which is readily available on Amazon. Your pizza crust will thank you (then you’ll thank us)!
When To Include Honey and Oil In Your Ooni Pizza Dough
I’ve included optional instructions for adding honey and oil to your pizza dough. This is a bit of a no-no in traditional pizza making circles, but there are some good reasons why you may want to include them.
Typically, honey is added to recipes designed for lower temperature home ovens because it adds color to the crust. But with a pizza oven, this isn’t strictly necessary. That said, adding honey will produce a darker and crispier crust, which is more in line with what Americans expect out of their pizza.
Adding honey can be especially beneficial for making New York and New Haven style pizza, which typically features a more crispy and charred crust than Neapolitan style. So, the choice is yours – I recommend experimenting with and without to see which you prefer better.
As for olive oil, this mainly affects the texture and softness of the dough itself. Many people (myself included) prefer to add olive oil to pizza dough because it’s generally easier to stretch and less likely to absorb moisture from the ingredients. Olive oil can also add a bit of extra crispness to the crust, but this is minimal.
My advice: if you’re a traditionalist making Neapolitan style pizza, skip the honey and oil. But if you’re American (or just like American style pizza), you’ll probably want to add honey and olive oil to this recipe.
Related Questions:
Can You Buy Pizza Dough For Ooni?
You can use any store bought pizza dough with your Ooni pizza oven, but for the best results it’s ideal to make your own. To make your own Ooni pizza dough, you can follow Ooni’s official pizza dough recipe or my own personal recipe (improved recipe) I’ve listed above.
How Do You Make The Perfect Ooni Pizza?
Making the perfect Ooni pizza, as with any kind of pizza made in any kind of oven, starts with a well-made pizza dough. To make the perfect Ooni pizza dough, find a good recipe and follow it carefully. I recommend fermenting your pizza dough in advance for optimal flavor and a delicate texture.
How Do You Roll Out Ooni Pizza Dough?
It’s always better to shape a pizza dough by hand rather than rolling it out with a rolling pin. Rolling out a pizza dough will squeeze out all of the air and gas that built up during the proving process which will bake into a flat crust with poor texture. To shape your pizza dough by hand, start in the middle and gently push the air into the outer crust. Do this until the pizza dough reaches your desired size.
Which Caputo Flour For Ooni?
The best Caputo flour to use for making Ooni pizza dough, in my opinion, is Caputo Chef’s Flour. Caputo Chef’s Flour is delicate, like all 00 flours, yet strong enough to make a dough that is elastic and easy to work with. If you don’t have Caputo flour available to you, you can always use regular all purpose flour to make an excellent pizza dough as well.




Hi – Great article and well thought out recipe. I had 1 question re: the balls of dough. How long can they remain in the fridge or can they be frozen for later use?
Thanks
eric
Hi Eric!
The dough balls can be left in the fridge for 1-2 days, just make sure to let them proof at room temperature for a few hours before you use them. If you prefer, you can refrigerate the dough for longer, up to a week, but you’ll need to re-knead, re-ball and proof them to build the gluten back up.
thank. you!
How much yeast if I am using instant dry yeast?
Hi Michael,
Normally, I use 1/4 teaspoons of active dry yeast (as per the recipe). You can either substitute instant dry yeast 1:1, or use about 25% less.
Yeast can be tricky to work with because there are so many variables like hydration, the type of flour and temperature that affect the outcome.
If you find your dough hasn’t risen at all, you may need to use more yeast or leave it to rise in a warmer spot. If the dough is overblown and smells alcoholic, you might want to experiment with less yeast or a slightly colder spot to rise.
Hope that helps! If not, I have a few articles specifically on yeast that might be useful that you can find in the archives.
-Dom
Thanks. Do you have a rough equivalent in grams?
Sure. A 1/4 teaspoon should be roughly equivalent to 1.2 grams. Yeast is one of the few ingredients I give using teaspoons because most people don’t have a scale capable of measuring such small amounts. Hope that helps!
One more question — when I double the recipe here the amount of flour etc double but the amount of yeast stays the same, is that right?
Hi Michael,
That’s odd, it should double all of the ingredients.
But yes, you should double the amount of yeast if you’re doubling all of the other ingredients. And as always, feel free to tweak the amounts when you see how they work in the real world (your kitchen).
Cheers
This is the perfect recipe, I’ll never use anything else again! Now I just want to make a larger batch. If I want to freeze the dough balls for future use, at what point should I do that?
Hi Michael. I’m glad you liked the recipe!
To freeze your leftover dough, follow the directions just as you did before by letting it rise, dividing it into balls and letting them proof.
However, this time let the dough balls you want to freeze proof in a freezer proof container like a tupperware, etc. Once the balls are proofed (at room temperature), stick the entire container in the freezer.
After several hours, when the proofed balls are completely frozen and solid, remove the balls from the container and seal each one tightly in a plastic bag, or plastic wrap, for storage in the freezer.
When you’re ready to use the dough balls, remove one, or more, from the freezer and let them thaw at room temperature. Once the balls reach room temperature (and are completely thawed), they should be ready to use.
Some people freeze the balls before proofing and let them proof after thawing, but I’ve found this method works for me and saves time since each ball is already proofed.
Hope that helps!
Dom
Have you subbed sourdough starter for yeast with the recipe? Saw elsewhere on your site you recommended 50% be starter when using, just wondered if you had any idea how this affected ferment and rise times as written.
Hey Jonathan, good question. You absolutely can use sourdough starter in place of yeast, in fact, depending on the quality of your starter, it can actually work even better than regular dry yeast. Both in terms of fermentation and taste.
As for how much to use, that really depends on how strong your starter is. In general though, dry yeast is very powerful so you’ll need to use more sourdough starter to replace it. I recommend starting with 50 grams of sourdough starter for every 1kg of flour (or 5%) and then working from there depending on the results.
This will most likely require some experimentation because each sourdough starter is a bit different. Good luck!
Thank you! V. excited to break in my Karu 16 and wanted to work in my sourdough practice from the get-go! Will try your recipe first to get a hang of it though.
Domenic, apologies, am I just missing it, or can you point me towards the video you reference about making proper dough balls?
Thanks.
Hi Jonathan.
This is something I really need to make a video about myself. Making a proper dough ball is incredibly simple to do but difficult to explain.
Until then, refer to this video: https://youtu.be/oZxNbL5XB7w?t=92
Good luck!
I made a double batch and cooked 6 small pizzas in my Koda 16 tonight.
The crust was outstanding with a puffy outside and a nice soft chew. The dough was easy to handle and launched without too much flour on the peel. Bravo
Looks like you nailed it. Good job!
How do get the bottom of the pizza cooked?
Hi, Peter. Since this is an Ooni pizza dough recipe, I’ll assume you’re using a pizza oven. To get the bottom of your pizza cooked, make sure the oven is preheated for 20-30 minutes prior to cooking. If you’re using a pizza stone in a home oven, the same advice applies, except you need to preheat the stone for 60-90 minutes instead. This should give your pizza a nice golden brown color on the bottom. Good luck!
Hi Domenic,
I’ve been successfully using your recipe guidelines for a few months now and wanted to let you know how pleased I’ve been with the results. My mom, first generation Italian-American, taught me her method which is very close to your technique; no kneading involved, just flour, water, yeast, olive oil and a touch of salt….but I never knew about 00 flour until I found your blog! What a difference, plus your calculations for the hydration levels has helped now that I have a wood fired pizza oven. By the way, my great-uncle Vincent Madonna (Italian immigrant and bicycle racer) had a pizza shop in Providence, RI in the 1930s, “Madonna’s Famous Pizza Pies”‘ .I grew up pretty darn particular in regard to pizza thanks to my ancestry! Just wanted to thank you for this blog and helpful tips.
Hey Amy. Thank you so much for the kind words–it always means a lot coming from someone with a family tradition of making pizza. Keep up the good work!
Hi Domenic,
What temperature and for how long do you recommend that we cook each pizza in an Ooni oven?
Thanks for the recipe!
Hi Chelsea,
I always recommend cooking pizza at the maximum temperature, with a few exceptions for different styles. Use an infrared thermometer (if you have one) to see when the pizza stone in your Ooni reaches 800-900F before starting to cook… this usually takes around 20 minutes. As for timing, I don’t cook each pizza for a set period of time, rather I watch for visual signs that the pizza is finished cooking, especially the cheese. If using fresh mozzarella, watch for the cheese to start bubbling (but not browning) before taking it out. If using regular dry mozzarella, look for a few small brown bubbles beginning to form–if there are lots of big brown bubbles, it’s probably overdone. A Neapolitan pizza usually takes around 2 minutes to finish.
Of course, there are lots of variables (including personal taste) to factor in here, so these are just general rules of thumb. Once you’ve cooked a few pizzas successfully and know what you like, it will become natural for you. Good luck!
HI Domenic,
Clarification request regarding freezing the dough (you’ve addressed this a couple of times so apologies for the repetition), I’d essentially take the dough all the way through the recipe until just after step 15 (1-2 hours out of the fridge to bring to room temp) and the dough is about to be shaped into a pizza when I put it in the freezer right? I’m pretty new at this and it seems to me that pizza dough requires several transfers between the fridge and room temp to rise, shape up, and proof correctly so I wanted to confirm that I’m inserting the freezing steps you gave Michael at the correct point in the recipe.
Also do I need to change any of the early mixing steps if I’m using a stand mixer with a dough hook attachment?
Many thanks.
Hi Rob. You have it exactly right. Bring the dough right up to the point where you would use it (being careful not to overproof it in the process) and then transfer it to the freezer. If all goes well, by the time the dough is brought back up to room temperature (completely thawed), it should be ready to use again.
Keep in mind though that a frozen then thawed dough ball will be slightly more delicate than a fresh one. This is totally fine, but if you’d prefer a stronger ball you can alternatively freeze the dough before proofing it, thaw it, reform it into a ball, then let it proof. It takes more steps than the original method but the gluten will be slightly stronger in the end. Ultimately, the choice is yours.
As for the dough mixer question, you can do everything exactly the same. But since you are using a mixer, you can have the mixer do all the kneading for you and skip the “no-knead” part if you prefer. This would be preferable if you plan on using the dough on the same day, but you’d be missing out on all the benefits of fermentation. So, if you’re going to ferment it overnight anyways, using a mixer won’t really affect the outcome since the gluten network will get formed one way or another.
Hope that clears things up. Good luck!
Apologies if I have missed it, but how much dough does this make (in grams, or how many 12″ pizzas in my Ooni Koda 12 do the default quantities make?)
Hi Louis. This recipe makes 500g, or enough for two 12 inch pizzas.