How Do You Make Gluten-Free Poolish Pizza Dough?
Making gluten-free poolish pizza dough involves substituting traditional wheat flour with gluten-free alternatives like rice or almond flour. The key is to adjust the hydration levels, as gluten-free flours absorb water differently. A successful gluten-free poolish will still yield a flavorful and airy pizza crust, suitable for those with gluten sensitivities.
Have you ever heard of gluten intolerance? It’s when someone’s body has a hard time dealing with gluten, a type of protein found in wheat, barley, and rye. Because of this, many people need to eat foods that don’t have gluten. This is why finding good gluten-free options is so important. One popular food that usually has gluten is pizza. But don’t worry, there’s a way to make gluten-free pizza dough that tastes amazing. It’s called poolish dough. Today, we’re going to learn how to make a gluten-free version of poolish dough for pizza. We’ll go through what poolish dough is, choose the right gluten-free flours, and then create our gluten-free poolish starter.
Understanding Poolish Dough
Poolish dough is a special kind of dough used to make pizza. It’s made with equal parts flour and water and a little bit of yeast. This dough is left to rest for several hours or even a whole day. This resting time helps the dough develop a really good flavor and texture. When you use poolish dough for pizza, it makes the crust light, airy, and delicious. That’s why many pizza makers love using poolish dough.
The great thing about poolish dough is that it makes the pizza crust taste better and gives it a wonderful texture. The long resting time lets the dough develop all these tiny bubbles. When it’s baked, these bubbles help the crust become light and fluffy. Plus, the slow fermentation process brings out a rich, complex flavor in the dough that you just can’t get from a quick dough recipe.
Choosing Gluten-Free Flours
When making gluten-free poolish dough, the first step is picking the right flours. Regular poolish dough uses wheat flour, but we need to find gluten-free options. There are several types of gluten-free flours that work well for baking. Some good choices are rice flour, almond flour, and buckwheat flour. Each of these flours brings its own unique flavor and texture to the dough.
For the best results, it’s a good idea to use a blend of different gluten-free flours. Mixing different flours together can help mimic the texture and taste of wheat flour. This way, your gluten-free pizza dough will be just as delicious as traditional pizza dough.
Creating Your Gluten-Free Poolish Starter
To make your gluten-free poolish starter, you’ll need a blend of gluten-free flours, water, and yeast. A good starting point is to use 1 cup of gluten-free flour blend, 1 cup of water, and a small amount of yeast, like 1/4 teaspoon. This will make enough poolish for one pizza.
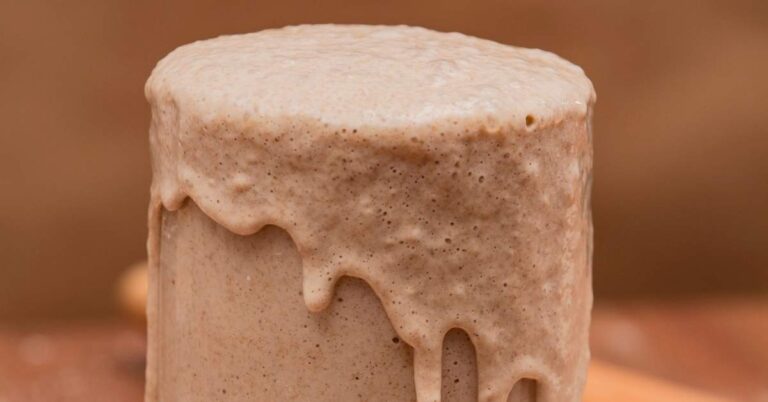
Here’s how to mix your ingredients: First, put the gluten-free flour blend in a large bowl. Add the water and yeast. Mix everything together until it’s well combined. This shouldn’t take more than a few minutes. Once it’s mixed, cover the bowl with a clean cloth and let it rest. The resting period is very important. You should let your poolish sit at room temperature for at least 12 to 24 hours. During this time, the yeast will start to work, creating those tiny bubbles that make the dough light and flavorful.
| Traditional Ingredient | Gluten-Free Alternative | Notes |
|---|---|---|
| Wheat Flour | Rice Flour | Light texture, neutral flavor. |
| Wheat Flour | Buckwheat Flour | Heavier, earthy flavor. Not related to wheat despite the name. |
| Wheat Flour | Sorghum Flour | Mild, sweet flavor. Good for breads. |
| Wheat Flour | Amaranth Flour | Nutty flavor, rich in nutrients. |
| Note: When using gluten-free flours, a binder like xanthan gum or psyllium husk may be needed to mimic gluten’s elasticity. | ||
Adapting Traditional Recipes to Gluten-Free Needs
When making gluten-free pizza, adjusting hydration levels is key. Gluten-free flours absorb water differently. Sometimes, you need more water, and other times, less. It’s important to watch the dough’s consistency closely. Also, yeast might need a change. If you’re using active dry yeast instead of instant, the amount or how you use it might be different.
Mixing, Kneading, and Fermenting Techniques
Mixing dough by hand or with a stand mixer each has its benefits and drawbacks. Hand mixing gives you a better feel for the dough, but a stand mixer can save time and effort. Gluten-free dough doesn’t need as much kneading, but it’s crucial to look for the right texture. Fermenting the dough might take more or less time, depending on the room temperature. This step is important for flavor.
Hand mixing vs. stand mixer use
Choosing between hand mixing and using a stand mixer depends on personal preference. Hand mixing allows for a more intuitive approach, while stand mixers offer convenience and consistency.
Knead times adjustments
Adjusting knead times is crucial for gluten-free doughs. The goal is to achieve a smooth, cohesive texture without overworking the dough.
Fermentation duration
The duration of fermentation can significantly affect the dough’s flavor and texture. Temperature plays a vital role in this process, with warmer environments speeding up fermentation.
Shaping & Baking Tips
Gluten-free dough can be sticky. Using flour dustings or parchment paper helps in handling it. Before baking, docking the dough or parbaking can prevent bubbles and ensure an even crust. Also, adjusting the oven temperature based on whether you’re using a stone or a tray is important for the perfect bake.
Handling sticky dough
To manage sticky gluten-free dough, lightly flouring your hands or the dough’s surface can make shaping easier. Parchment paper is also a helpful tool for transferring the dough without sticking.
Pre-bake strategies
Docking the dough with a fork and parbaking are effective strategies to achieve a crispier crust. These steps help in avoiding undercooked centers and overbrowned edges.
Oven temperature adjustments
Depending on your baking surface, stone or tray, you may need to adjust the oven temperature. Stones typically require a higher temperature for a crispier crust.
Final Thoughts
Adapting recipes to meet gluten-free needs is important for those with dietary restrictions. It’s a chance to experiment with different flavors and textures. Remember, making gluten-free pizza requires patience, especially during the trial-and-error phase. We encourage everyone to share their experiences and tips after trying this recipe. Your feedback can help others in their gluten-free baking journey.

