A Comprehensive Guide to Building Your Outdoor Pizza Oven
Expanding your home’s outdoor living space can significantly enhance your quality of life, and among the many custom additions available, an outdoor pizza oven stands out as a feature that brings joy to everyone.
While you could hire a professional contractor for this task, embarking on a do-it-yourself (DIY) journey allows you to craft a pizza oven tailored to your exact preferences.
In this guide, we’ll walk you through the process of building your own outdoor pizza oven, providing you with everything you need to know to get started.

Benefits of a Backyard Pizza Oven
Before delving into the construction details, it’s crucial to understand the myriad benefits of having a backyard pizza oven. This addition to your outdoor space not only enhances the ambiance but also serves as a functional and social centerpiece. Here are some key advantages:
Family and Friend Gatherings: A pizza oven creates an ideal setting for bringing together loved ones over delicious meals, making your outdoor space more enjoyable and memorable.
Increased Home Value: While building a brick pizza oven requires an initial investment, it can enhance your property’s value, potentially providing a favorable return on investment when selling your home.
Entertainment Focal Point: Your pizza oven will become the focal point of your patio, drawing guests in with the promise of mouthwatering wood-fired creations.
Authentic Cooking Experience: Unlike indoor ovens, outdoor pizza ovens offer an authentic wood-fired cooking experience that produces perfectly crispy and flavorful pizzas.
Heat Efficiency: During hot summers, keeping the oven heat outdoors is a more comfortable option than using indoor appliances.
Building Your Pizza Oven
Step 1: Planning Ahead
Before you start the construction process, it’s essential to take several important preparatory steps:
- Check Local Building Codes: Ensure compliance with local building codes and obtain any necessary permits.
- Plan for Utilities: If your pizza oven requires gas or electricity, plan for the necessary utility connections.
- Consider Professional Assistance: Licensed professionals can ensure safety, code compliance, and correct operation. Consult your insurance agent regarding liability and coverage adjustments.
- Prepare the Foundation: Construct a sturdy, level concrete foundation to support the oven’s weight and prevent settling.
Step 2: Tools and Supplies
You’ll need specific tools and supplies, although the requirements may vary depending on your chosen oven type. Here’s a general list:
- Cordless drill
- Circular saw
- Hacksaw
- Jigsaw
- Mallet
- Tub for mixing concrete
- Concrete mix
- Mortar (including mortar with fire clay for the oven interior)
- Trowel
- Hammer
- Bricks
- Plywood
- Metal chimney duct
- Rubber work gloves
Step 3: Choose the Location
Select a permanent location for your pizza oven, considering factors like level ground, good drainage, ample space for the oven and prep areas, and distance from flammable structures.
Step 4: Build the Oven
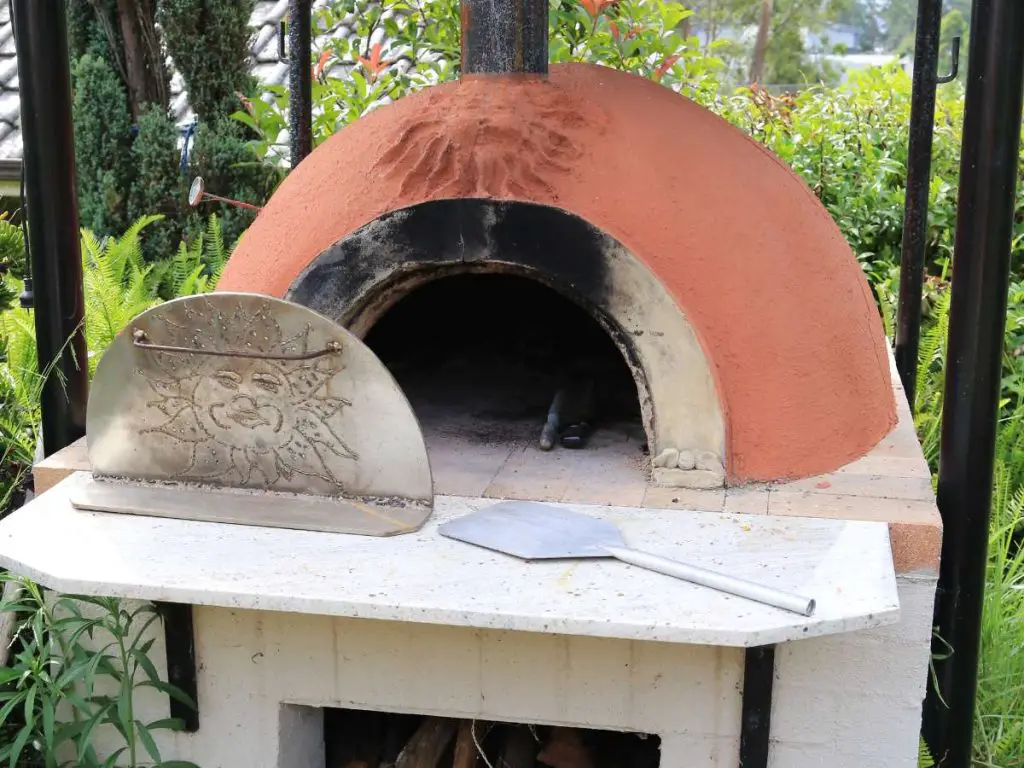
The actual construction process can vary based on the type of pizza oven you choose to build (wood-fired, brick, gas, or charcoal). Here is a simplified overview:
- Create a robust concrete foundation with a rebar grid to prevent cracking.
- Lay out bricks for the oven’s bottom, ensuring even alignment for proper insulation.
- Build the front arch and rear dome using bricks, ensuring a plywood template for the dome.
- Add mortar between bricks, smoothing it with a trowel.
- Construct the chimney, ensuring it extends at least 20 inches above the dome for effective smoke removal.
- If you’re not comfortable with a DIY approach, you can purchase a pizza oven building kit or enlist the help of a local handyman.
Using Your Pizza Oven
To operate your pizza oven effectively:
Invest in an infrared thermometer to maintain the required temperature (usually around 700°F). If using wood, replenish the fire every 30 minutes to maintain the desired temperature. Allow 90 minutes for the oven to heat up before cooking, so plan ahead to avoid delays.
Making Homemade Pizza

Preparing homemade pizza is a rewarding part of owning a pizza oven. Here’s a simple pizza dough recipe for four pizzas:
Ingredients:
- 4 cups of bread flour (or stone-milled flour)
- Pinch of salt
- 1 tablespoon of olive oil
- 1 ounce of brewer’s yeast (or 2 teaspoons of active dry yeast) dissolved in 1 cup of warm water
Instructions:
- Create a mound with the flour and make a well in the center.
- Add olive oil, salt, and the yeast-water mixture.
- Knead the dough for about 10 minutes until smooth and elastic.
- Allow the dough to rise for about two hours, doubling in size.
- Divide the dough into four parts, shape into balls, and flatten each into an eight-inch diameter circle.
- Add your favorite toppings and slide the pizza into the oven for a quick cook (approximately 1-1.5 minutes) at the desired temperature.
Maintaining Your Pizza Oven
Proper maintenance ensures the longevity and performance of your pizza oven:
- Clean the oven after each use, removing ashes with a small shovel and brush.
- Use vinegar or baking soda to scrub the oven interior during thorough cleanings, avoiding detergents.
- Routinely inspect for cracks and fill superficial ones with grout or mortar.
- Cover the oven if you live in a rainy climate to prevent water damage.
With your DIY pizza oven, your outdoor living space will become a favorite gathering spot, perfect for not only pizza but also other delicious dishes. Whether you choose to follow a pre-made plan or create your own design, your culinary adventures await.
Happy building and bon appétit!


