
Authentic Neapolitan Pizza Recipe - 70% Hydration, Cold-Fermented, No-Knead, Direct Method
Ingredients
Pizza Dough
- 2 1/4 cup 00 Flour (282 grams)
- 4/5 cup Water (202 ml)
- 1/8 tsp Yeast (0.35 grams)
- 1/2 tbsp Honey (10 grams)
- 2 1/4 tsp Extra Virgin Olive Oil (10 grams)
- 2 tsp Fine Salt (9 grams)
Toppings
- 1/2 cup San Marzano Tomato Sauce (100 grams - Recipe Below)
- 3 oz Fresh Mozzarella (85 grams)
- Sprinkling of Grated Parmigiano/Parmesan Cheese (not too much)
- 5 Fresh Basil Leaves (small)
Instructions
Mix Pizza Dough
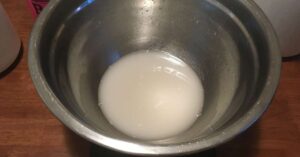
- Combine the water, yeast, and honey in a large mixing bowl.
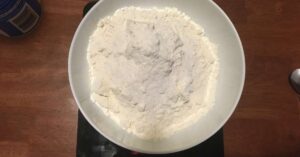
- Mix together the flour and salt in another bowl.
- Add 1/2 of the flour and salt mixture to the wet ingredients in the mixing bowl. Mix well with a stiff spatula or wooden spoon (or your hands, but it will be very wet).
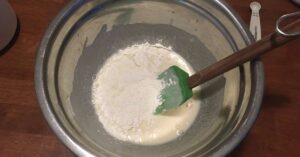
- Add extra virgin olive oil to the mixing bowl and incorporate it fully into the mixture.
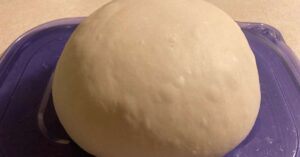
- Add the rest of the flour/salt mixture to the dough and mix it roughly until no dry flour can be seen. Cover the mixing bowl with plastic wrap and let it sit at room temperature for 30 minutes.
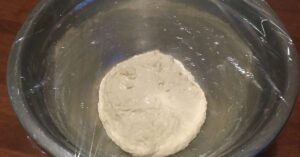
- 30 minutes later, give the dough a quick mix with the spatula until it has a smooth consistency with no visible lumps of flour. This should take no more than a minute. The dough should be noticeably less sticky and wet than it was previously.
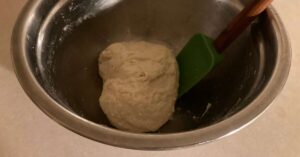
- Let the dough sit for 8-10 hours (or overnight) at a cool room temperature. This will take the place of kneading the dough, as well as give the yeast some time to ferment. The dough will rise in the bowl, but don't worry about it "doubling" in size (like many other pizza dough recipes) as we're only using a minimal amount of yeast.
Divide and Proof Pizza Dough
- The next morning (or 8-10 hours later), place the dough in the fridge for 24 hours. This will cold-ferment the dough and improve its texture and taste to better resemble Neapolitan style pizza. I highly recommend you do this if at all possible, the difference is worth it. But, if you're in a rush, you can immediately divide up the dough into balls and skip directly to the next step.
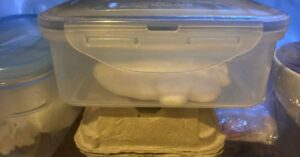
- Lightly grease a medium sized plastic container with olive oil. This is where an individual dough ball will proof for a few hours before baking.
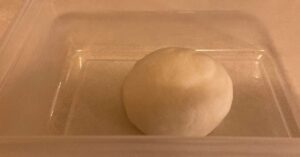
- Take the dough from the fridge and divide it into 2 equal parts (250 grams each). With your hands very lightly coated in olive oil, form each piece of dough into a tight, compact ball. There are several ways to do this, but it helps to "tuck" or pinch the bottom of the ball so that the top of the ball is pulled tight. The idea is for the dough ball to be evenly shaped with a taught skin around it. This will help strengthen the gluten and retain gas as the dough ball proofs. See the instructional videos at the bottom of this page if you need some visual help.
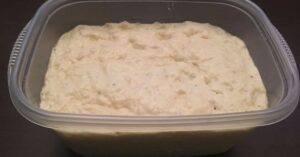
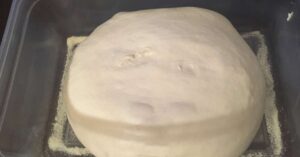
- Place each dough ball into a greased proofing container, and let the one you plan on using rest at room temperature for 2-3 hours. The other ball can be refrigerated or frozen for later use.
- As the dough ball proofs, it will expand and relax, so make sure the edges of the container are greased (or floured) to avoid sticking to the sides. When the dough ball reaches room temperature and is fully relaxed, it's ready to use. Important: Make sure to give it enough time to relax or it will be difficult to stretch and not bake properly.
Prep Tomato Sauce
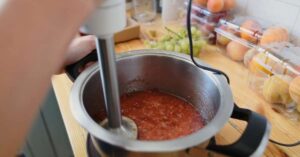
- This recipe will assume you're using canned tomatoes such as the ones listed above. To begin, pick the tomatoes out of the can and place them in a mixing bowl. You can include the juice (or pulp) as well, but I prefer not to.

- For a 28 oz (798 ml) can, add a 1/4 teaspoon of salt and a tablespoon of olive oil.

- Using an immersion blender, potato masher, or your hands, lightly crush the tomatoes. The aim here is to get the tomatoes somewhere between smooth and chunky. I simply pulse the tomatoes using my immersion blender until the big chunks are broken up. The sauce is now ready to use.
Par-Bake The Crust & Sauce
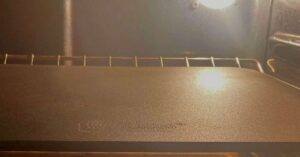
- Place your pizza steel on the top rack of the oven and set it to its maximum temperature. Let the pizza steel preheat for 1 hour, or until it reaches its maximum temperature according to an infrared thermometer.
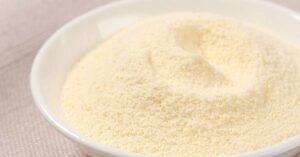
- Prepare a small pile of semolina flour on a clean counter, or a bowl full of semolina flour big enough to fit a dough ball.
- Turn over the proofing container and drop the proofed dough ball into the semolina flour. Press down lightly on the dough ball, then flip it over and do the same. The idea here is to thoroughly coat the dough ball in semolina flour to prevent sticking to the counter as we shape it.

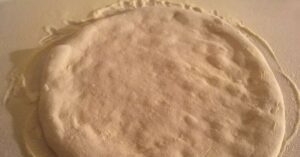
- Transfer the dough to a clean counter top (lightly dusted with flour) and begin to gently flatten the dough into a roughly 10-12 inch disc. You can do this by gently pressing the air from the middle of the dough out into the edges using the flat part of your fingers, then flipping it over and doing the same thing going the other way. Be very gentle with the dough as you flatten it or all the gas will escape and it will lose its texture. Also, be sure not to pinch or flatten the very edges (about 1 inch around) as this will form the crust. Dust very lightly with semolina flour if it gets sticky. See the instructional videos at the bottom of this page for a visual illustration of how to do this.
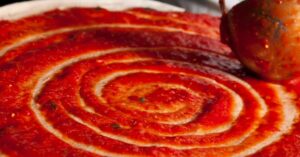
- When the dough is shaped to your liking, gently spread some or all of the tomato sauce on top of the crust. Be sure not to press too hard with the spoon (or the dough will stick to the counter) and leave an inch around the edges of the dough without sauce (so it puffs up in the oven).
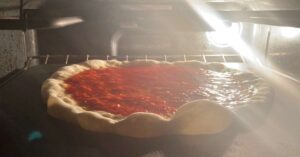
- Now for the hardest part. Dust your pizza peel with semolina flour and place it on the countertop with the tip pointing towards the pizza. Using both hands, hook your fingers under the dough and slowly pull it towards the pizza peel. If the edge of the peel is flush with the counter, the dough should slide right on. If the edge is raised above the surface, you can prop the handle up slightly to angle it downwards. Be sure to dust the edge with semolina as well. The dough will stretch and contort as you pull it—this is fine. Note: This photo is only used for illustration purposes, your pizza shouldn't have mozzarella yet.

- Give the pizza peel a very light shake to make sure the dough isn't sticking to the peel. If it moves freely, use your fingers to carefully stretch the dough back out one more time. Note: The pizza will retract as it bakes, so stretch your pizza 1-2 inches larger than your intended size. Also, ignore the toppings on the pizza in the photo.

- When the pizza is ready, touch the tip of the peel to back of the preheated pizza steel. Wiggle the peel a little to get the pizza sliding off and slowly pull the handle back towards you. If all goes well, the pizza will slide right onto the pizza steel. This part takes some practice to master. The most common issue is sticking on the way down, so make sure to use enough flour on the peel.
Bake The Pizza
- When you see a few brown spots beginning to form on the outer edges and underside of the crust, take it out of the oven. This should take anywhere from 5-7 minutes, but timing will vary depending on your oven.

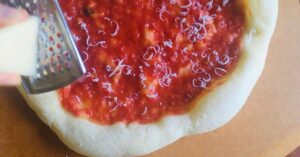
- Grate or shred a small amount parmigiano or pecorino cheese over the hot tomato sauce.
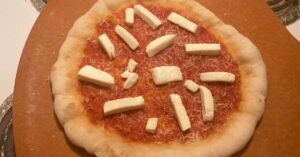
- Slice the fresh mozzarella into cubes or batons and spread them evenly across the pizza with a drizzle of olive oil. Work quickly so the pizza doesn't cool down too much.
- Let it bake until the cheese starts to bubble and the crust is a golden color with some darker brown spots. Add fresh basil slices to your liking.

- When the pizza is finished, take it out of the oven and immediately place it on a cooling rack (if you have one) for 2-3 minutes then slice and serve. Enjoy!